Set it up on your phone or computer
The car's browser is a hard place to set anything up. There's no copy and paste, so every shortcut means typing a web address out by hand on the touchscreen, and addresses for your places the same way. Sign in to www.touchdash.app on your phone or a computer instead, where you can paste a link or an address, build your dashboard there, and it's on the car screen the next time you open it. Nothing is stored on the car, so a Tesla software update can't wipe it.
- In the car, open the browser and go to touchdash.app. Bookmark it, or add it to the car's favorites, so it's one tap next time.
- Sign in once. The car stays signed in.
- Changes you make on your phone show up on the car screen within a few seconds, no reload needed.
Tabs
Your dashboard starts with three tabs: Quick Actions, News & Info, and Shortcuts. They're only a suggestion. Make as many as you like, name them whatever you want, and put anything on any of them.
- Tap Edit Sites at the top of the dashboard to turn on edit mode. A Manage button appears in the tab bar.
- In Manage Tabs, rename a tab by typing in its name box, pick a different icon, or use the up and down arrows to reorder.
- Add Tab makes a new one. The trash icon deletes a tab and everything on it, so move anything you want to keep first.
- Swipe left or right on the car screen to switch tabs, or tap the tab bar at the bottom.
Widgets and shortcuts
A widget is a tile: weather, news, your calendar, a clock, a contact card for ETA texts. A shortcut is a tile that opens a website. Both live on the same grid and are arranged the same way.
Adding
- Turn on edit mode with Edit Sites. Two tiles appear at the end of the grid: Add Widget and Add Site.
- Add Widget lists every widget. Pro widgets are marked; the rest work on the free plan.
- Add Site asks for a name and a web address. Type the address exactly as you'd put it in the browser.
Arranging
- In edit mode, press and hold a tile for a moment, then drag it where you want it. The short hold stops the car's bumps from moving things by accident.
- Drag a tile's bottom corner to resize it. Widgets have a smallest size they'll shrink to.
- Tap the X on a tile to remove it. Removing a contact card doesn't delete the person; they're still on your People page.
- Tap Edit Mode On to finish. Out of edit mode, tapping a shortcut opens the site, and on Pro, tapping a widget opens it full screen.
People and ETA texts
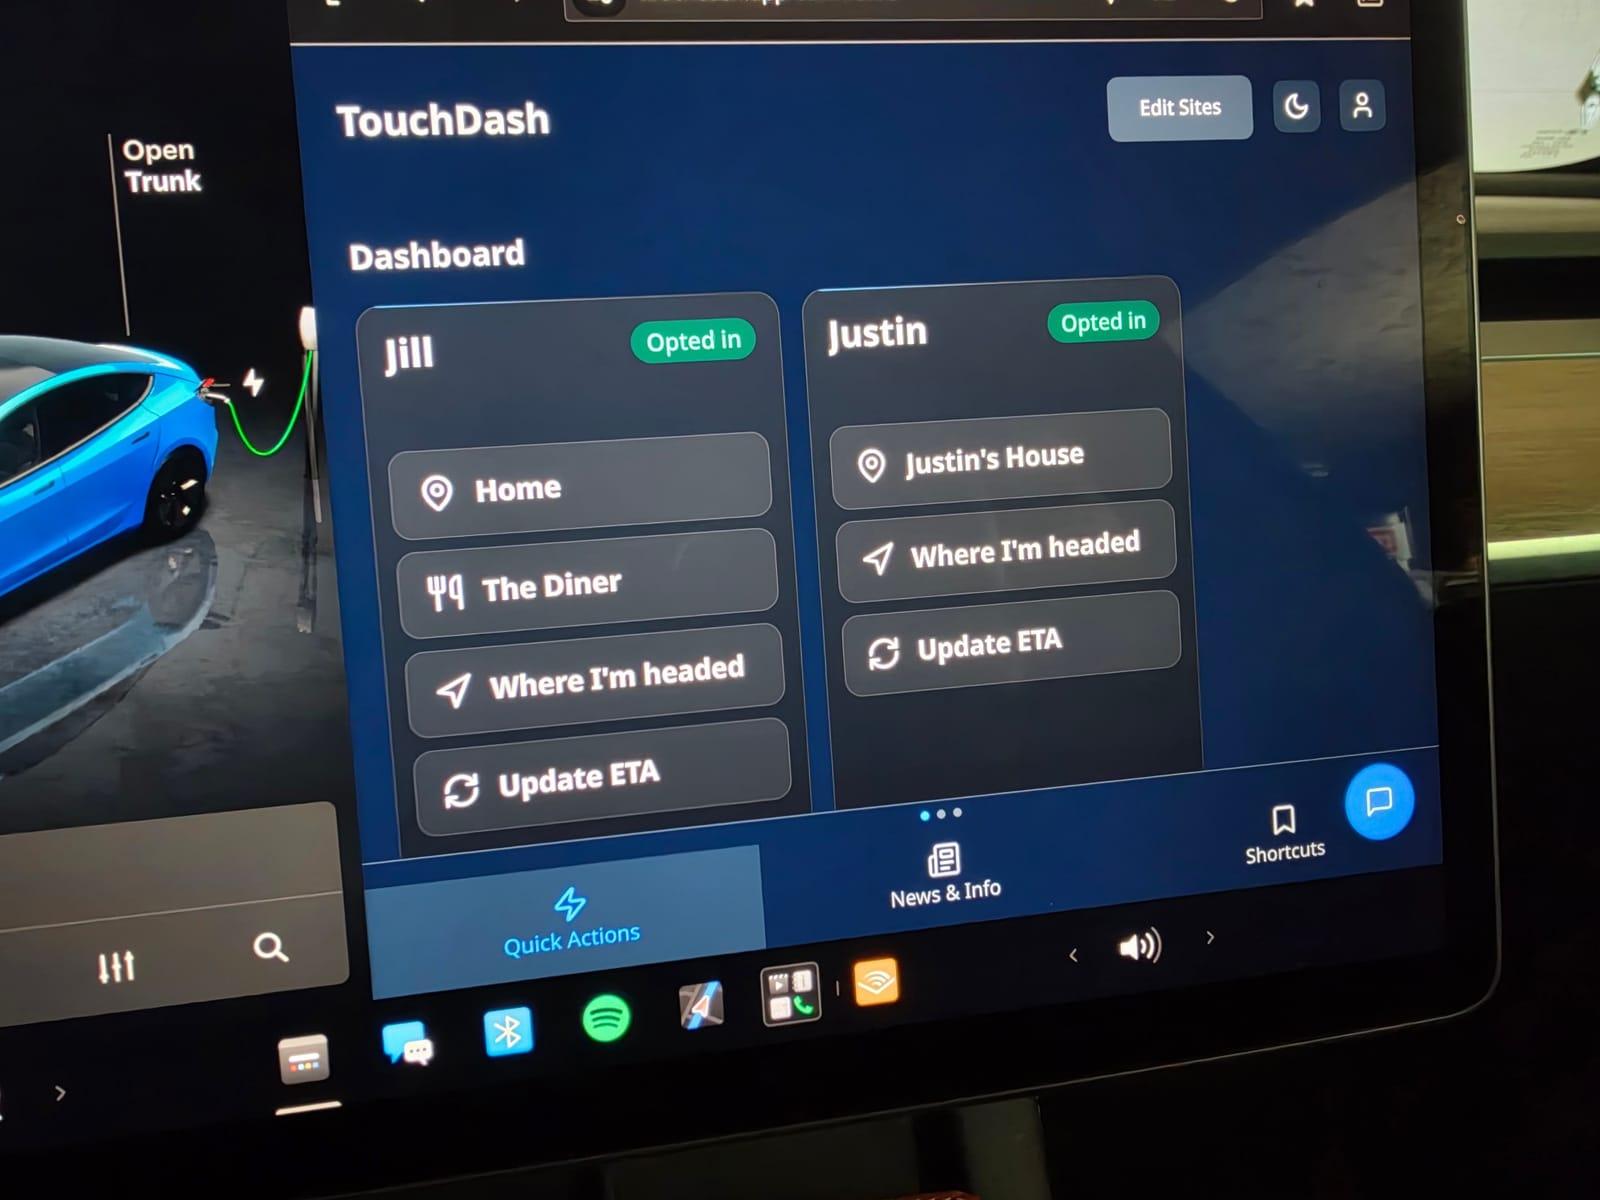
A contact card is a widget for one person. Each button on it sends them a text with your ETA: tap a place like Home and the car navigates there and texts the arrival time; tap Where I'm headed to send whatever destination is already in the navigation; tap Update ETA when traffic changes.
- Connect your Tesla first, under Settings. The ETA comes from the car's own navigation.
- To add someone: Add Widget, then Text a person, then Add someone new. Enter their name, number, and optionally a first place like Home. Their card appears right away.
- They get one text asking them to reply YES. Until they do, the card says Waiting for opt-in and won't send. If the text never arrives, tap the card and choose Resend text.
- Change what the texts say, add more places, or remove someone on the People page.
- The free plan includes one person and ten ETA texts a month. Pro removes both limits and keeps the text updated as you drive.
Still stuck?
Email support@touchdash.app and say what you tapped and what you saw. It goes to the person who built it.